
Usage Guide
PostLineNews Documentation
Learn how to access the platform, import company posts, review content, generate reports, and embed selected posts on your website.
1. Add the Widget to Your Website
Add the CSS and JavaScript files to your website page. Replace
YOUR_WIDGET_KEY with the Widget Key from your dashboard.
<link rel="stylesheet" href="https://postlinenews.com/css/posts.css">
<script
    src="https://postlinenews.com/js/posts.js"
    data-widget-key="YOUR_WIDGET_KEY"
    data-posts-widget="1"
></script>
Then place the widget layout where you want the posts to appear.
<div class="posts-wrap">
<div class="filters">
<div class="filters-row">
<label>
From:
<input type="date" id="dateFrom">
</label>
<label>
To:
<input type="date" id="dateTo">
</label>
<button type="button" id="applyFiltersBtn" class="btn-filter">Apply</button>
<button type="button" id="clearFiltersBtn" class="btn-filter secondary">Clear</button>
</div>
</div>
<div id="postsOverlay" class="posts-overlay" aria-hidden="true" style="display:none;">
<div class="overlay-box">
<span class="spinner" aria-label="Loading"></span>
<span id="overlayText">Loading…</span>
</div>
</div>
<div id="emptyState" class="empty-state" style="display:none;">
<div class="empty-title">No posts found</div>
<div class="empty-sub">Try adjusting your date range.</div>
</div>
<div id="postsGrid"></div>
<div id="pageLoader" class="loading-global" style="display:none;">
Loading…
</div>
</div>
<div id="imgLightbox" class="img-lightbox" aria-hidden="true">
<button type="button" class="img-lightbox-close" aria-label="Close">×</button>
<button type="button" class="img-lightbox-nav prev" aria-label="Previous">‹</button>
<img id="imgLightboxImg" alt="" src="">
<button type="button" class="img-lightbox-nav next" aria-label="Next">›</button>
</div>
<div class="pagination-custom" id="pagination" style="display:none;">
<button id="prevBtn" disabled>←</button>
<div id="pageNumbers"></div>
<button id="nextBtn" disabled>→</button>
</div>
<div class="powered-link-wrap">
<span>Powered by</span>
<a href="https://postlinenews.com" target="_blank" rel="noopener noreferrer">
PostLineNews
</a>
</div>
<div id="error" class="alert alert-danger position-fixed"
style="top: 20px; right: 20px; z-index: 1000; max-width: 400px; display: none;"></div>2. Domain Access
For security, the widget should only run on approved company domains. If the widget does not load, make sure your company domain has been verified and allowed from your dashboard.
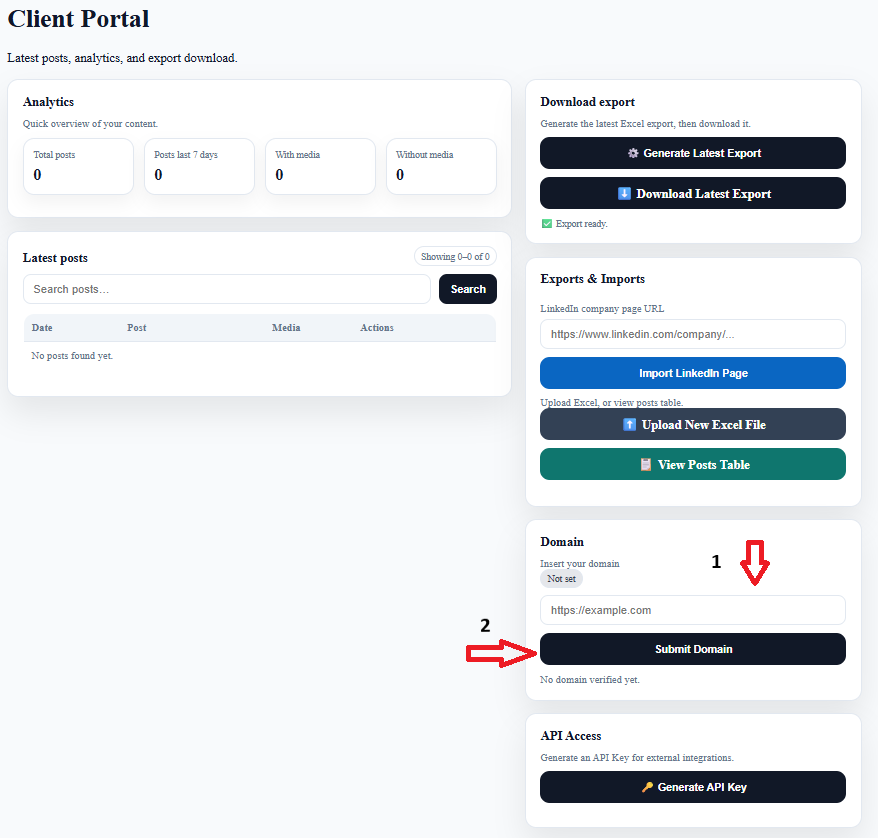
3. Website Widget Setup
PostLineNews can display selected company posts on your website using a secure widget. First, copy your Widget Key from the dashboard.
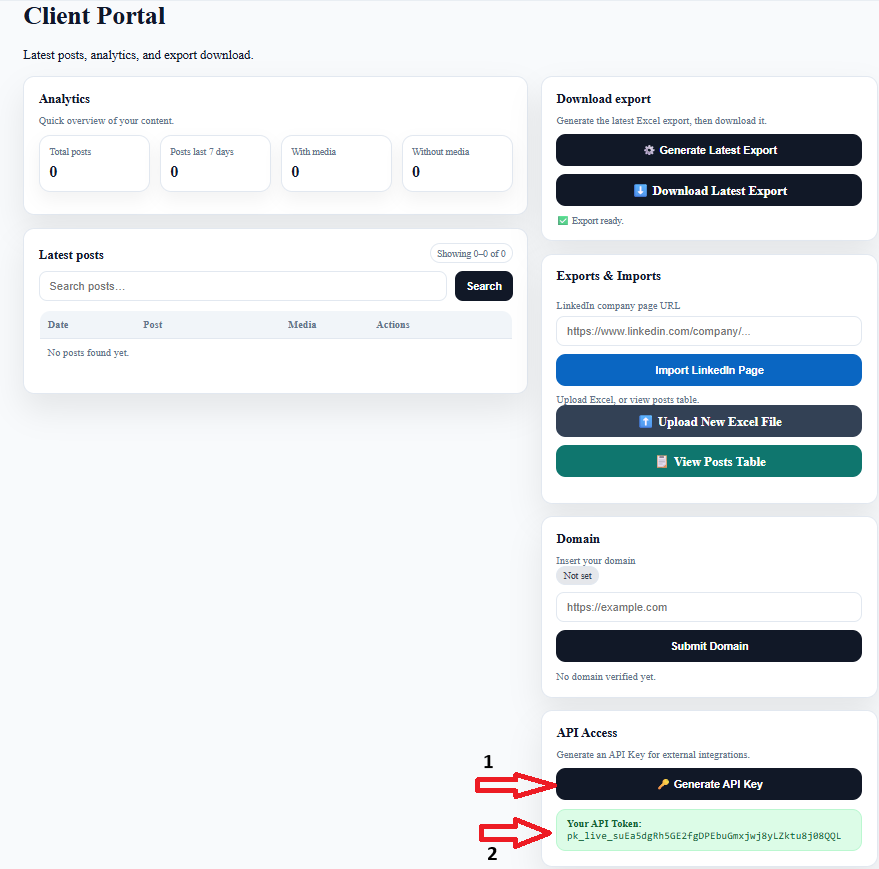
4. Access the Platform
Log in to your account to access your company dashboard. New users can create an account first.
5. Import Company Posts
PostLineNews allows your team to bring company social media posts into one clean dashboard. You can import posts from supported company page workflows or upload an export file when needed.
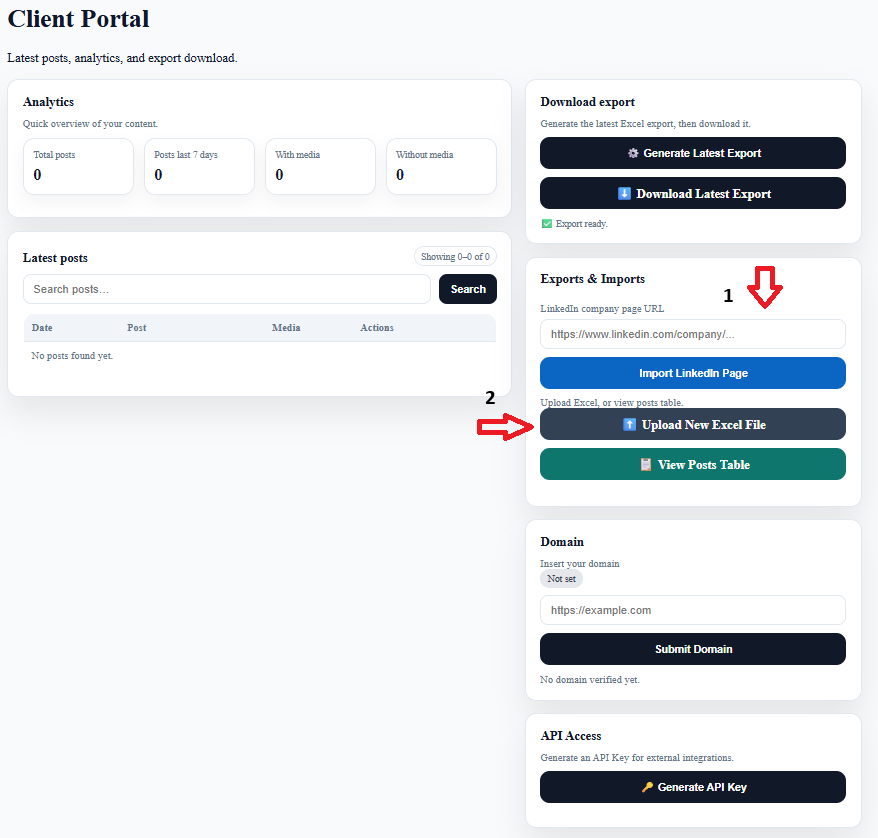
6. How to Export a LinkedIn File
If your team uses a LinkedIn export file, download it from your LinkedIn Company Page analytics area.
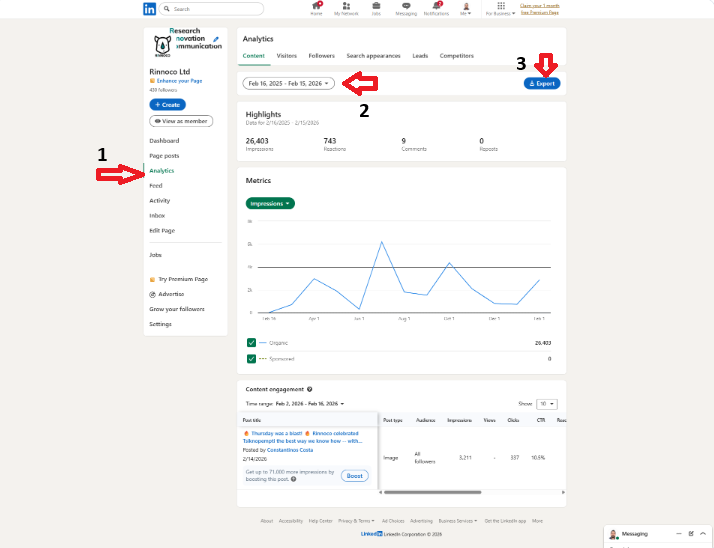
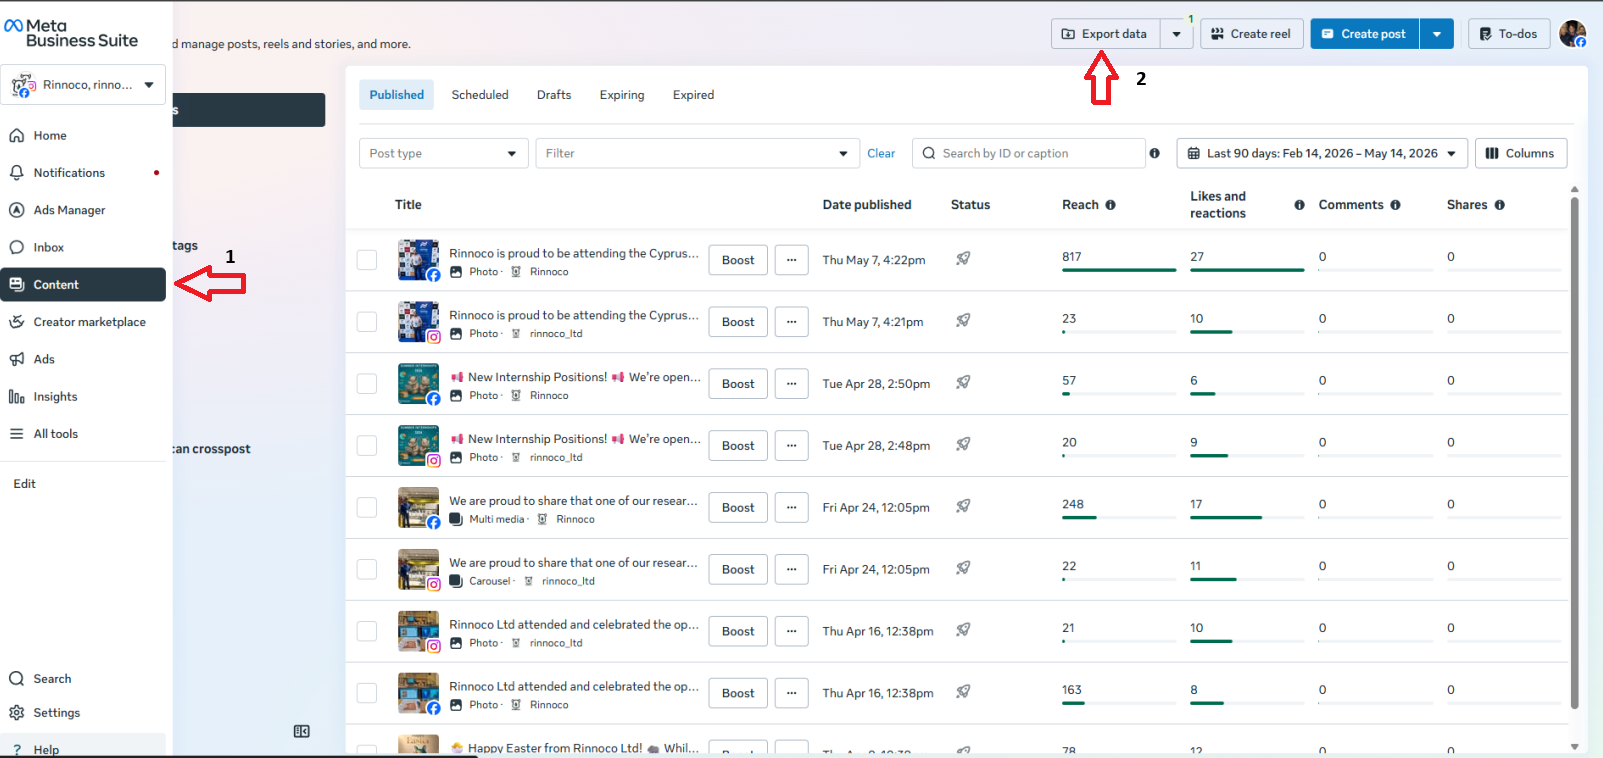
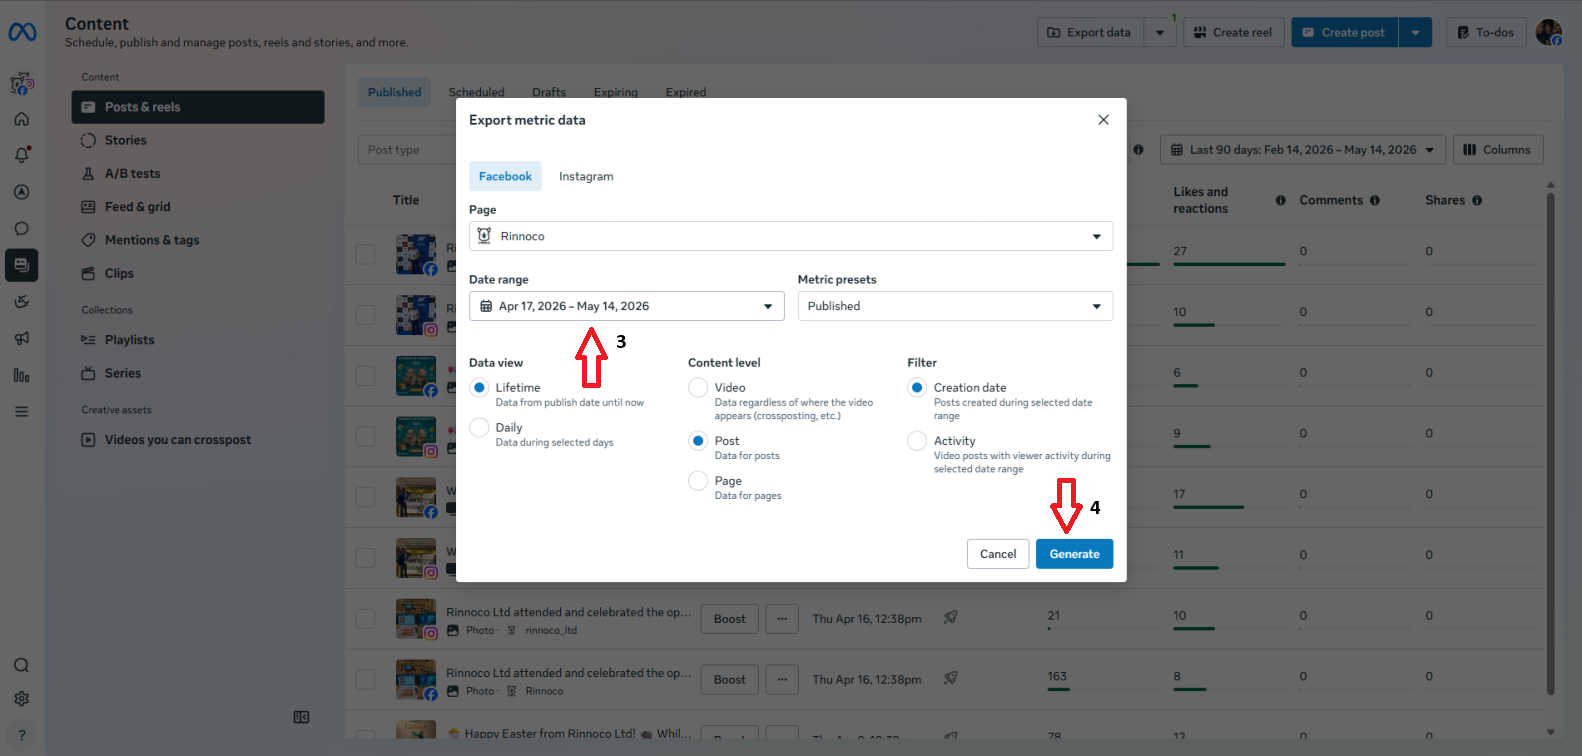
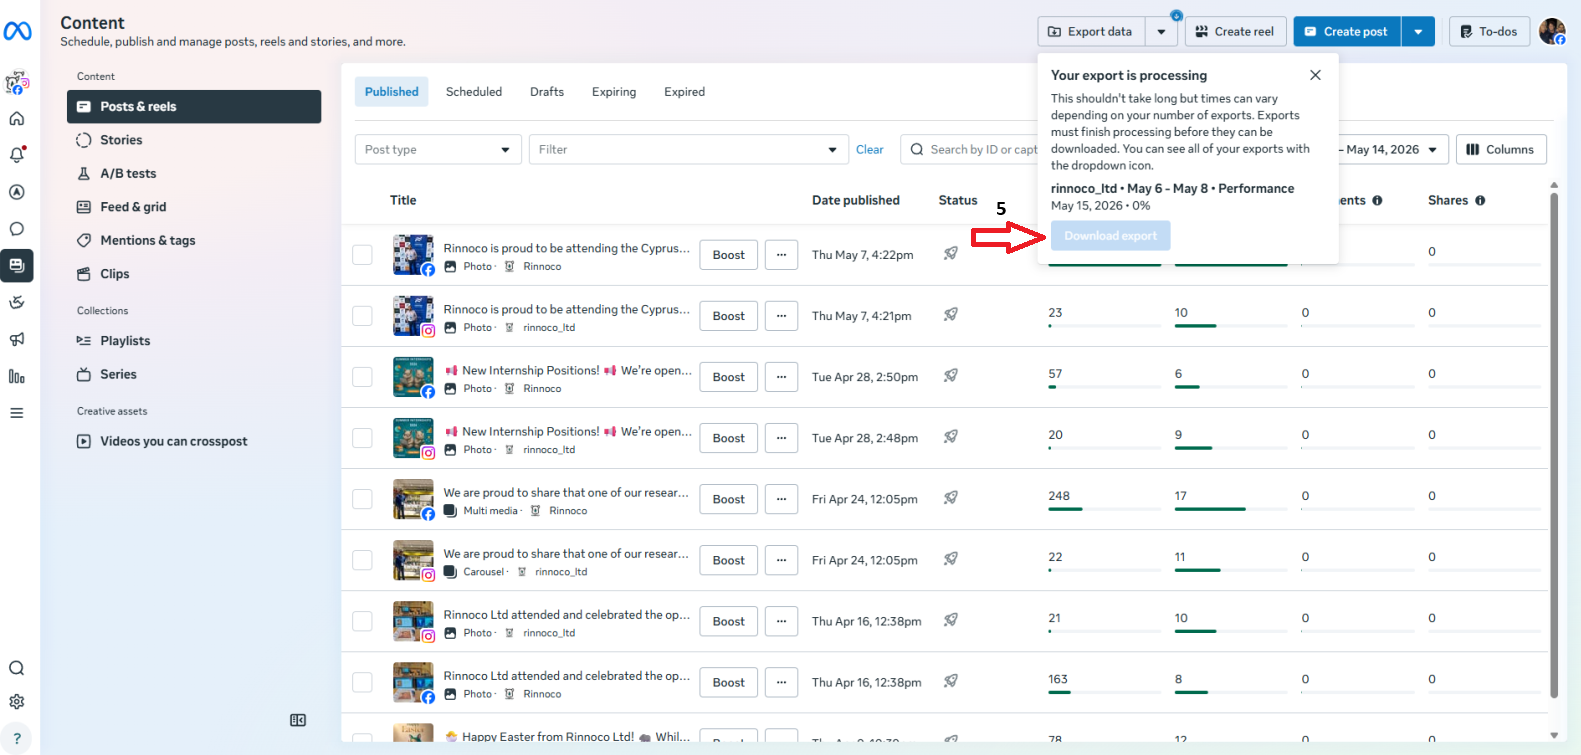
7. How to Export a Facebook / Instagram File
If your team wants to upload Facebook or Instagram posts, first export the file from Meta Business Suite.
8. Upload an Export File
After downloading your export file, upload it to PostLineNews so the platform can process and organize your company posts.
Upload File9. Review and Filter Posts
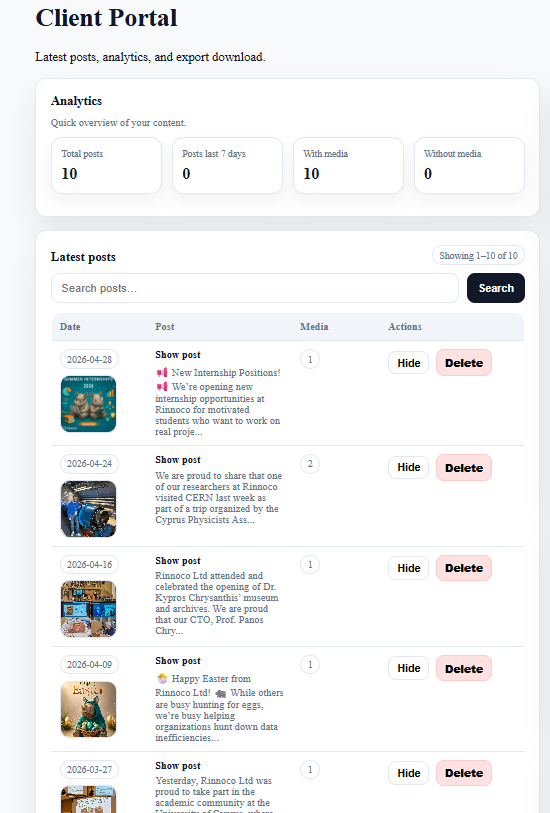
Once posts are imported, you can review them in the dashboard, preview available media, and use date filters to find the content you need.
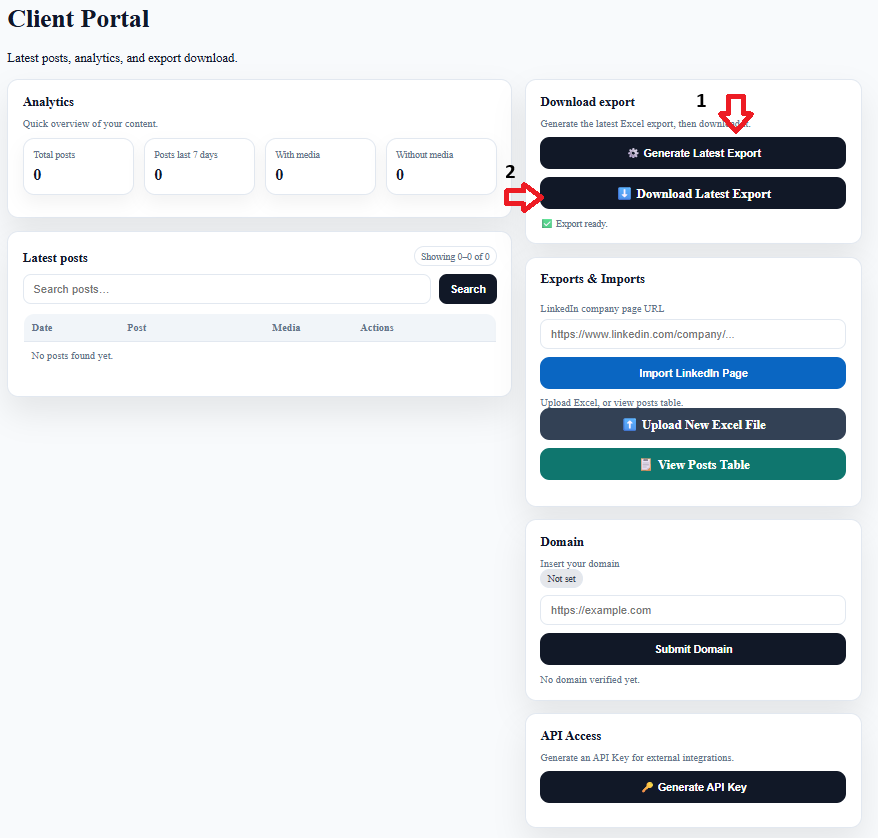
10. Generate an Excel Report
Use the export action from your dashboard to generate the latest Excel report for internal review, archiving, or sharing with your team.
Need Help?
If you cannot import posts, generate exports, or load the website widget, contact your platform administrator.